Online
Reservation
Integer congue malesuada eros congue varius. Sed malesuada dolor eget velit pretium. Etiam porttitor finibus. Nam suscipit vel ligula at dharetra
Integer congue malesuada eros congue varius. Sed malesuada dolor eget velit pretium. Etiam porttitor finibus. Nam suscipit vel ligula at dharetra

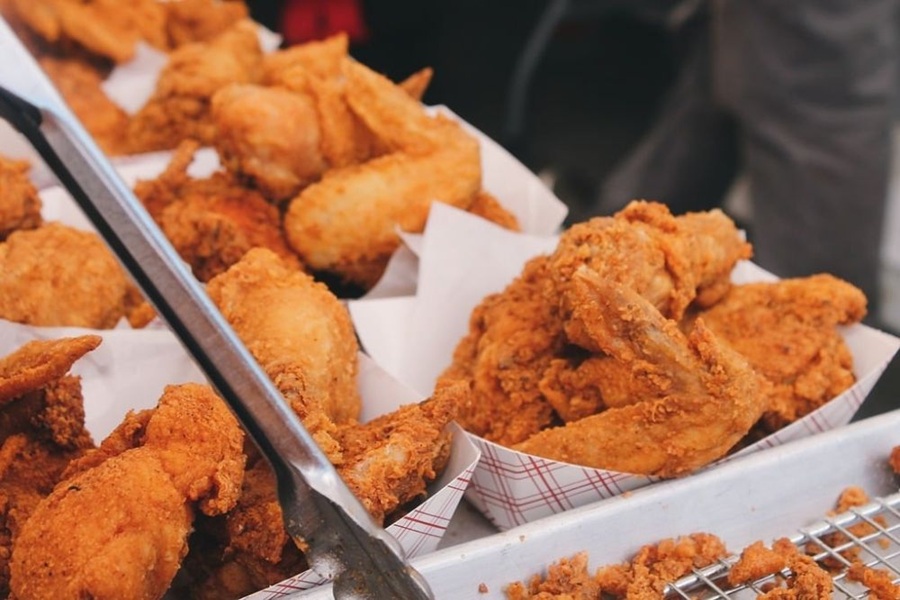
Moisture plays a significant role in the loss of crispiness. When fried chicken cools down, steam trapped inside the meat begins to escape. This moisture migrates to the breading, leading to a soggy texture.
Once removed from hot oil, fried chicken needs proper airflow for cooling. Poor cooling techniques can lead to condensation forming on the surface of the chicken and softening its crispy coating.
The type and condition of frying oil also play a pivotal role in maintaining crispiness. Once oil degrades (due to overheating or repeated use), it can leave a greasy residue that clings to the surface instead of producing a clean, crunchy crust.
Temperature control is crucial when frying and storing fried chicken. If not kept within an appropriate range after frying, both hot and cold fluctuations negatively affect texture.
Time itself is another unavoidable factor in losing crispiness. Over hours, even properly stored fried chicken gradually absorbs moisture due to natural processes and environmental exposure.
| Issue | Cause | Solution Ideas |
| Moisture retention | Steam escaping internal meat | Let excess oil drain fully after frying; store correctly |
| Improper cooling | Condensation from poor airflow | Use wire racks for airflow during cooling |
| Oil saturation | Degraded or low-quality frying oil | Change oils frequently; use high-smoke-point options |
| Temperature changes | Cooling too fast or holding too hot | Maintain consistent storage temperatures |
By recognizing these challenges early on and taking intentional steps during preparation and storage phases, caterers can better ensure that their fried chicken remains as crispy as when it left the fryer—delighting guests with its perfect texture even hours after it’s prepared.
| Factor | Why It Matters |
| Three-Step Breading | Enhances adhesion & creates layers of crunch |
| Cornstarch Addition | Absorbs excess moisture & boosts crispiness |
| Proper Oil Temperature | Prevents greasy texture & ensures thorough cooking |
By focusing on these critical preparation steps—breading selection and precise frying—you set yourself up for success when serving crisp fried chicken that maintains its texture long after it leaves your kitchen.
The breading and frying method you choose plays a critical role in ensuring your fried chicken stays crispy for catering events. A well-prepped coating not only provides the desired crunch but also helps seal in moisture, preserving both texture and flavor. Below are some essential guidelines to help optimize your technique for lasting crispiness.
| Key Factor | Recommendation |
| Oil Type | Peanut oil, vegetable oil |
| Temperature | Maintain between 325°F–350°F |
| Coating Mix | All-purpose flour + cornstarch/rice flour |
Once fried, allow the chicken pieces to rest briefly on a wire rack set over a sheet pan instead of paper towels. This step prevents steam from building up under the chicken while excess grease drains away efficiently—ensuring every piece retains its crisp outer layer.
By carefully selecting ingredients, employing proper techniques like double-coating, and controlling frying conditions effectively, you can significantly improve how long fried chicken stays crispy during catering events.
The way you handle fried chicken immediately after it comes out of the fryer can make or break its crispiness. Proper draining techniques are essential to prevent oil from pooling on the surface of the chicken, which can lead to sogginess. Below, we outline practical tips and proven methods to ensure your fried chicken stays perfectly crispy.
When fried chicken is removed from hot oil, excess grease clings to its surface. If left unattended, this oil doesn’t just affect the texture; over time, it can also alter the taste and overall quality of the dish. Proper draining ensures that your breading remains crisp while reducing unnecessary grease for a more enjoyable eating experience.
| Draining Method | Benefits | Drawbacks |
| Wire Rack | Optimal air circulation; no sogginess | Requires extra setup space |
| Tilted Fryer Basket | Easy and efficient | May not remove all residual oil |
| Absorbent Paper Towels | Convenient option | Can trap moisture if not used wisely |
Properly managing this critical step in preparation ensures your fried chicken delivers maximum crunch and flavor when served at catered events—delighting guests every single time.
Maintaining fried chicken’s crispy texture while using warming equipment can be a challenge. Warming equipment, such as chafing dishes or heated cabinets, is essential for catering events to keep food at proper serving temperatures. However, improper use of these tools often results in moisture buildup, which makes the chicken soggy. Here’s how to use warming equipment effectively without compromising the crunchiness of your fried chicken.
| Food Safety Guidelines | Recommended Temperature |
| Safe Holding Temperature | 140°F (60°C) or higher |
| Ideal Crispness Maintenance Range | 140°F–160°F (60°C–71°C) |
Excessively high temperatures may dry out meat while too low allows bacteria growth.
For long events, divide your fried chicken into smaller batches and rotate them periodically into fresh warming trays instead of leaving large quantities in one dish for extended periods. This maintains freshness and reduces prolonged exposure to heat that could make it lose crispiness.
By carefully managing your warming equipment, you can deliver perfectly crispy fried chicken that impresses guests every time.
The type of warming equipment you use plays a key role in keeping fried chicken crispy. Consider these options:
– Warming Trays or Chafing Dishes: Opt for models with built-in ventilation to prevent steam buildup. – Heat Lamps: These are effective for maintaining warmth without introducing moisture. – Convection Warming Cabinets: Use equipment with low humidity settings to circulate dry heat evenly.
Be sure that any equipment you choose includes adjustable temperature and humidity controls.
Temperature management is crucial when using warming equipment. Here’s what to keep in mind: – Keep the temperature between 165°F and 185°F (74°C – 85°C). This range ensures the food stays safe and warm but doesn’t degrade the texture of the coating. – Avoid overheating, as excessive heat can dry out the chicken or cause it to overcook.
Placing fried chicken directly on flat, solid surfaces can cause condensation underneath, leading to sogginess. To avoid this: – Use perforated trays or wire racks inside your warming equipment. These allow air circulation around the chicken and prevent moisture from collecting underneath. – If using chafing dishes, consider placing a layer of crumpled aluminum foil below the wire rack for better airflow.
Moisture is your biggest enemy when trying to maintain crispiness: – Avoid covering fried chicken entirely with lids unless necessary; instead, leave them slightly ajar for ventilation. – For enclosed setups like warming cabinets, adjust humidity levels to low or zero settings.
When moisture control is essential: – Line trays with absorbent paper towels or parchment paper to help wick away excess grease or condensation. – If possible, preheat containers or warming trays before placing chicken inside so they don’t create sudden temperature changes that encourage condensation.
| Equipment Type | Key Features | Benefits |
| Heat Lamps | Infrared bulbs; optional stands | Prevents direct contact; reduces sogginess |
| Convection Cabinets | Adjustable dry heat settings | Even heating without trapped moisture |
| Perforated Warming Trays | Elevated design with holes | Maintains airflow; minimizes pooling |
By following these guidelines and selecting appropriate tools and methods, you’ll be able to keep fried chicken warm while retaining its signature crunch—essential for any successful catering event. Following proper techniques demonstrates professionalism and ensures client satisfaction every time you serve this popular dish.
When serving fried chicken at catering events, maintaining its crispy texture is key to creating a satisfying dining experience. The following strategies focus on preserving the crunchiness of fried chicken from the moment it reaches the serving table until it is enjoyed by guests.
Placing fried chicken directly on solid trays or plates can lead to trapped steam, which makes the breading soggy. Instead, use wire racks to elevate the chicken. This allows proper air circulation around each piece and prevents moisture buildup.
Serving all the fried chicken at once can lead to it sitting out for too long, which increases its chance of losing crispiness. By serving in smaller batches, you ensure that guests receive freshly crisp servings while allowing time to replenish as needed.
If buffet-style service is part of the catering setup, choose ventilated chafing dishes or containers rather than airtight lids. Ventilation helps release steam and preserves crispness during long events.
| Container Type | Impact on Crispiness |
| Airtight Containers | Traps moisture and softens breading |
| Ventilated Chafing Dishes | Maintains airflow and limits sogginess |
To maximize guest satisfaction, gently remind servers or attendees that freshly served fried chicken tastes best when eaten immediately. For self-service setups, include signage subtly suggesting this for quality assurance purposes.
While visual appeal matters during presentation, excessive garnishing near fried chicken can introduce unwanted moisture and compromise its crunchy exterior. Use dry herbs or edible decorations sparingly around your dish rather than directly on top.
By employing these strategies during service at catering events, you can maintain perfectly crispy fried chicken that leaves a lasting impression on your guests’ palates while reflecting professional care and attention to detail in your culinary approach.